64 Bit Operating Systems
1. Download anycomms64.exe
2. Save the file to an appropriate location, that the machine on which you are wanting to install Anycomms has access to.
3. Run the downloaded executable file (anycomms64.exe). This can be double clicking on the file.
4. Click on Run on the “Open File – Security Warning” Window
5. Read the information in the “Anycomms for 64bit Windows Versions” window. Click OK
6. Click Unzip on the WinZip Self-Extractor Window
7. Click OK to the message informing you that 10 files have been unzipped successfully.
8. Close the WinZip Self-Extractor Window
9. Browse to C:\Anycomms. You will see that the Anycomms program files have been unzipped to this location.
10. In C:\Anycomms double click WinRCS32.EXE to start the Anycomms program
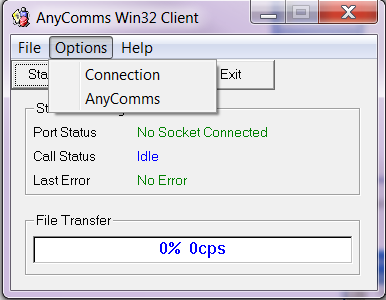
11. Click Options > Connection
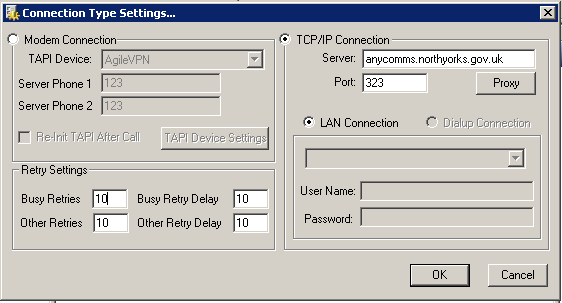
12. In the TCP/IP Connection area of the Connection Type Settings… window, change the port to be 323 (from 443). This is required to work with Smoothwall.
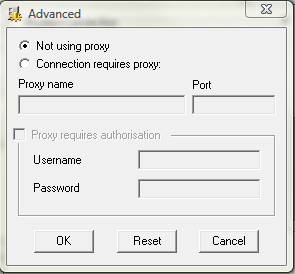
13. Next click the Proxy button. If you recieve your internet connection via a Smoothwall box, ensure that the radio button beside Not Using Proxy is checked. Click OK
14. Click OK again. You should now be back at the main Anycomms window. This time click Options >> Anycomms

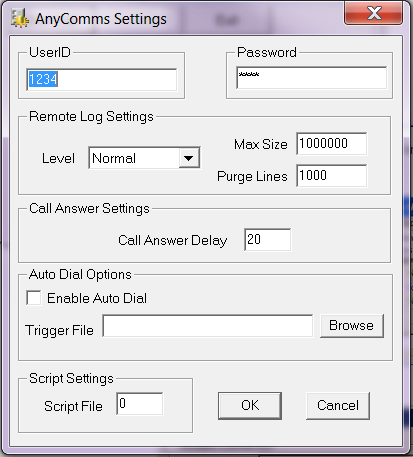
15. This will open the Anycomms settings window. Enter the appropriate User ID and password for the school. Click OK
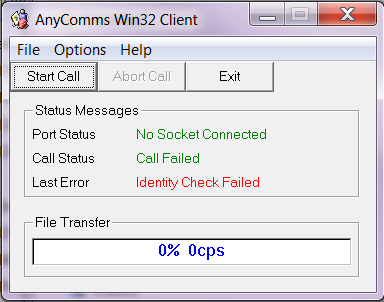
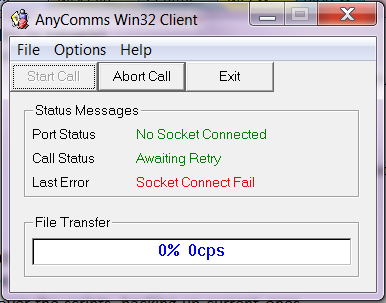
16 Finally, you can click Start Call to see if the software connects correctly. The anycomms window will indicate the current port and call status, and also the last error, as shown below. If you get the error Identity Check Failed, please repeat step 15 and make sure you have got the username and password correct. If you get the error Socket Connect Fail, please repeat steps 11 – 13 and check that your connection settings are correct. Once you have seen Anycomms connect OK, you can click Abort Call to stop the call and not have to wait for it to complete as normal.
If required, copy the two shortcuts in this folder, Anycomms Client and Finance Anycomms Client, to the users desktop and or Start Menu folder as appropriate. If installing purely for groupcall you do not necessarily need to do this as only the groupcall program will be using anycomms, not users.
Anycomms should now be installed and running. If you continue to experience problems please contact the Schools ICT helpdesk on 01609 53 6086


